Why is an APAAR ID important?
Every student needs an APAAR ID because it helps you get important services and resources related to your studies. Let’s understand it in a simple way.
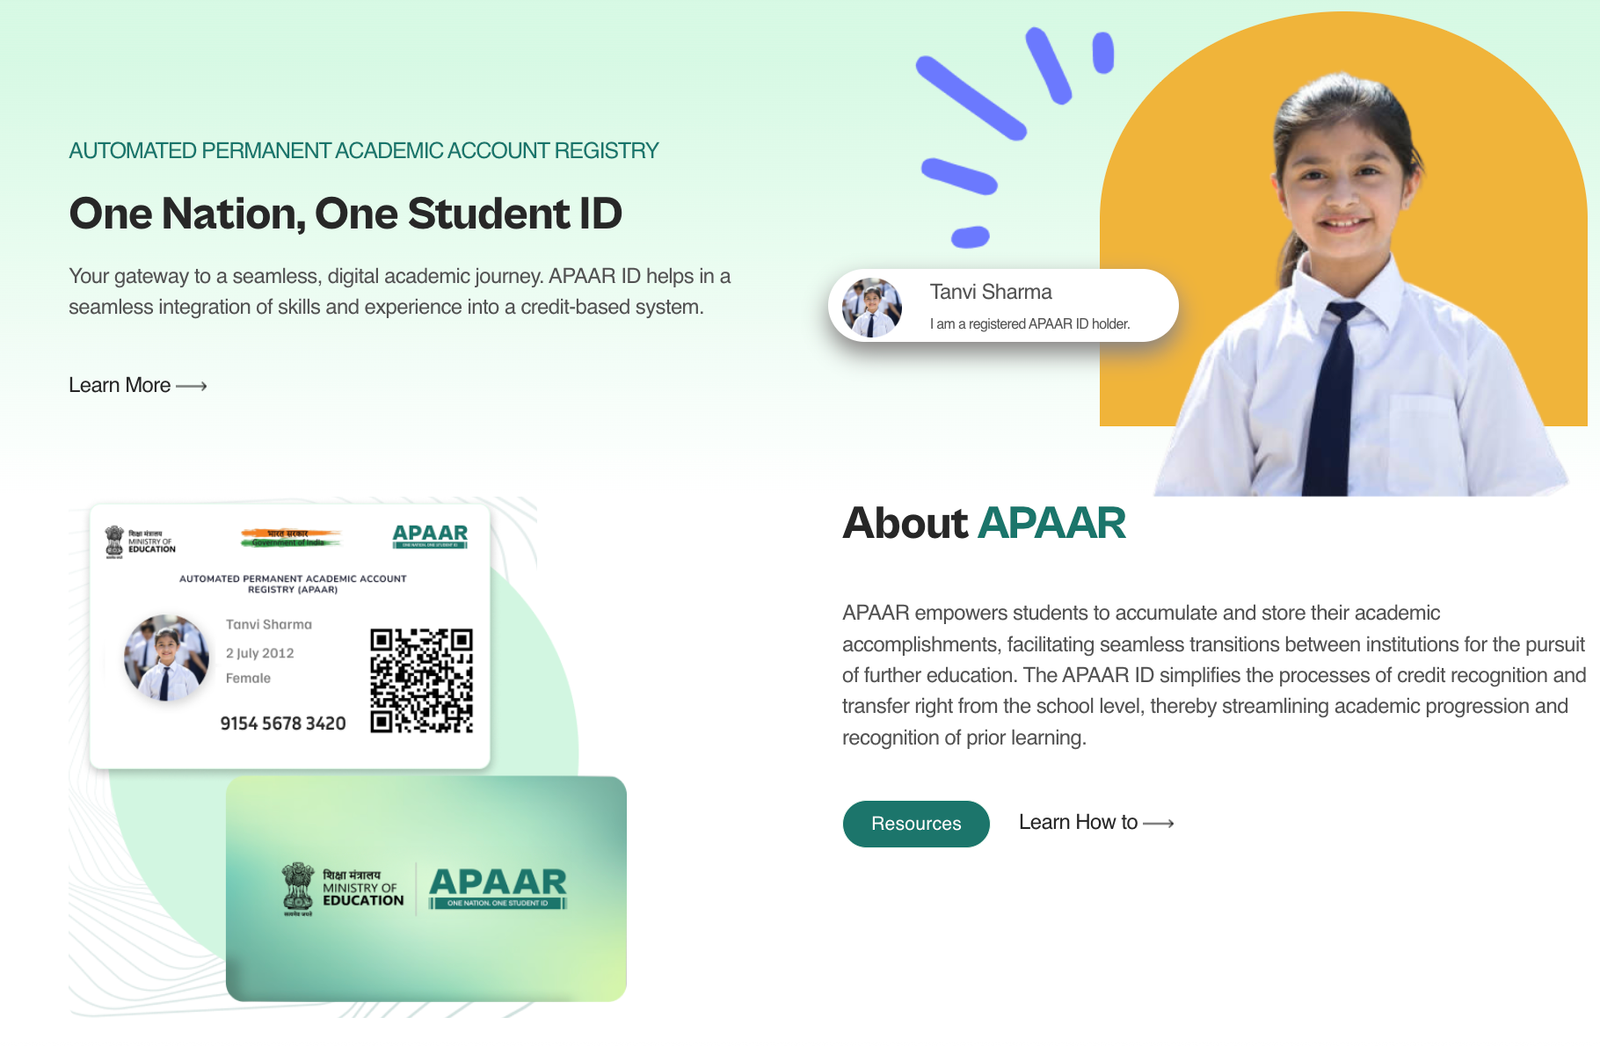
What is an APAAR ID?
An APAAR ID is a special 12-digit number given to students. It works like a digital ID card that safely stores all your academic records in one place. With this ID, you can easily access your:
- Report cards
- Marksheets
- Grade sheets
- Certificates
- Degrees and diplomas
- Co-curricular achievements
In short, your APAAR ID is your permanent digital identity in the education system. It makes managing and accessing your academic records simple and convenient.

Why Do You Need an APAAR ID?
An APAAR ID makes your academic journey smoother. With it, you can:
- Register for exams
- Check your results
- Access different online education services
Without this ID, you might miss important updates or face problems in tracking your academic progress. Think of it like a concert ticket—you can’t get in without it. In the same way, your APAAR ID is your entry pass to the education system.
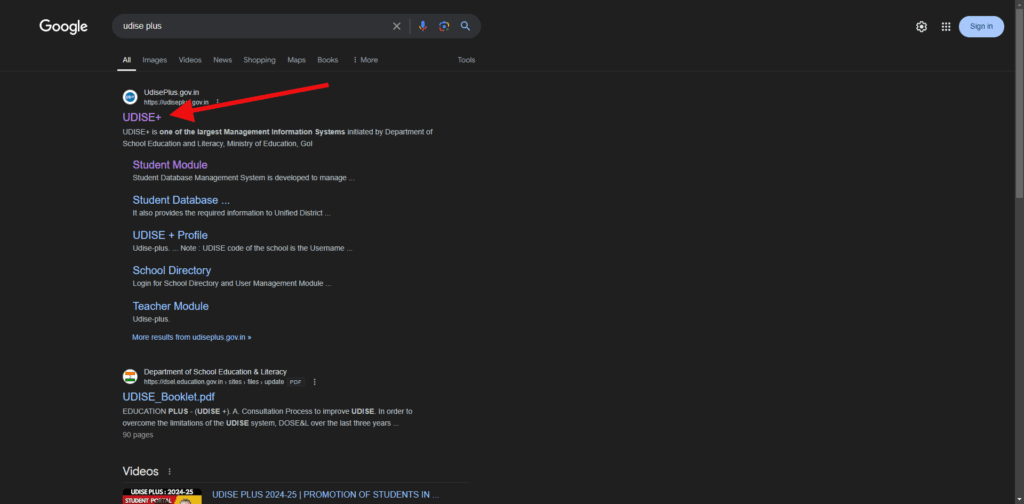
Step 1: Visit UDISE+ Official Website
To kick off the APPAR ID creation process, head over to the official UDISE+ website. This is your starting point. The website is user-friendly and has all the resources you need. Look for the section related to student services, where you will find information on creating your APPAR ID.
Step 2: Login to UDISE+ Official Website
Once on the website, Login to UDISE+ Official Website . Often, it’s clearly marked. Click on it, and you’ll be directed to a new page with instructions. This page will guide you through the process, so keep it handy.
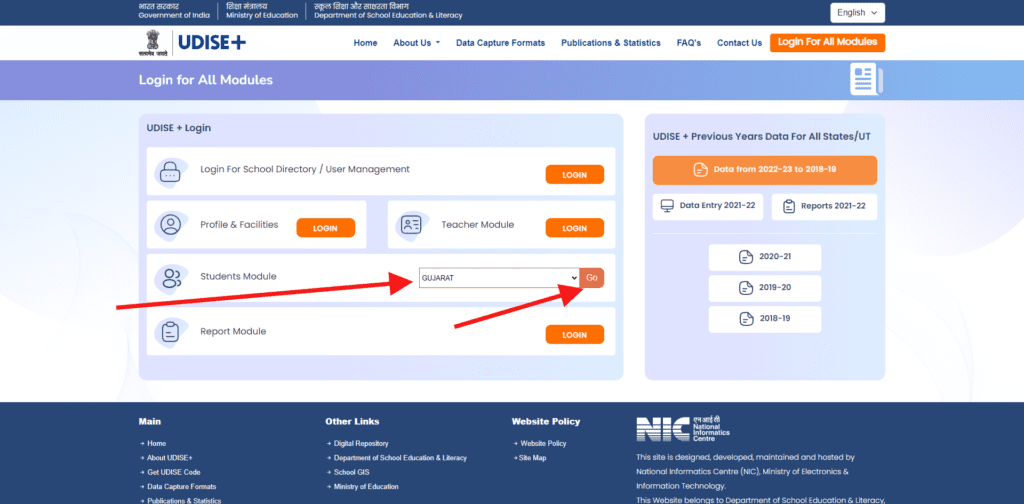
- Click on Login For All Modules
- Click on Select Your State
- Click ON Go.
Step 3: Click On UDISE+ Current Academic Year 2025-26
Once logged in, locate and click on the option or link specifically related to the current academic year (2025-26). This action will direct you to the relevant section or form for data entry, updates or reporting related to the 2025-26 academic year.
This step is crucial for accessing or updating information specific to the 2024-25 academic year on the UDISE+ portal.
Step 4: Update 2025-26 Information School Information on UDISE+
In order to generate APAAR, Student’s all forms should be completed (GP, EP, FP and Finalise).
- Save or submit the updated information.
- Navigate to the “School Information” section.
- Review existing information for accuracy.
- Update any outdated or changed information, such as:
- School name and address.
- Contact details (phone number, email, etc.).
- Infrastructure details (classrooms, labs, etc.).
- Staff and teacher information.
- Enrollment numbers.
- Other relevant school-specific data.
- Ensure all required fields are completed.
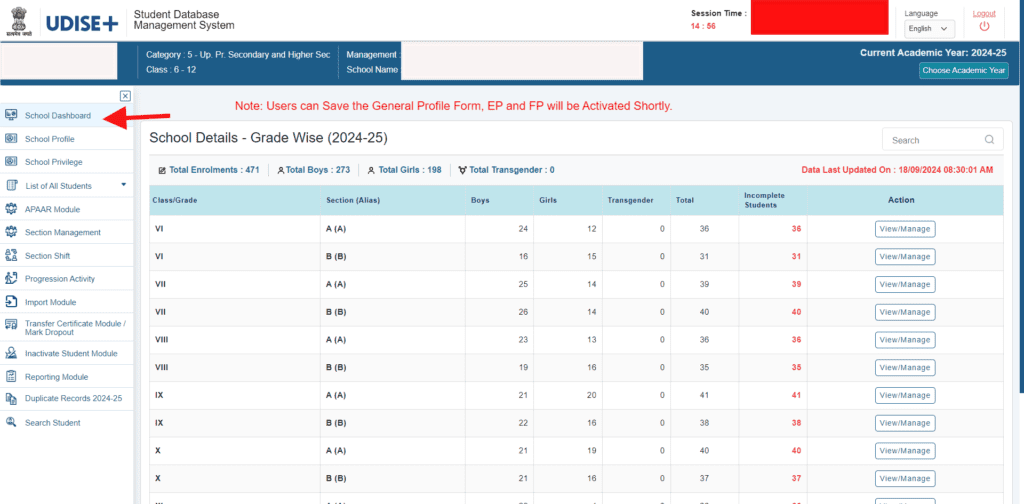
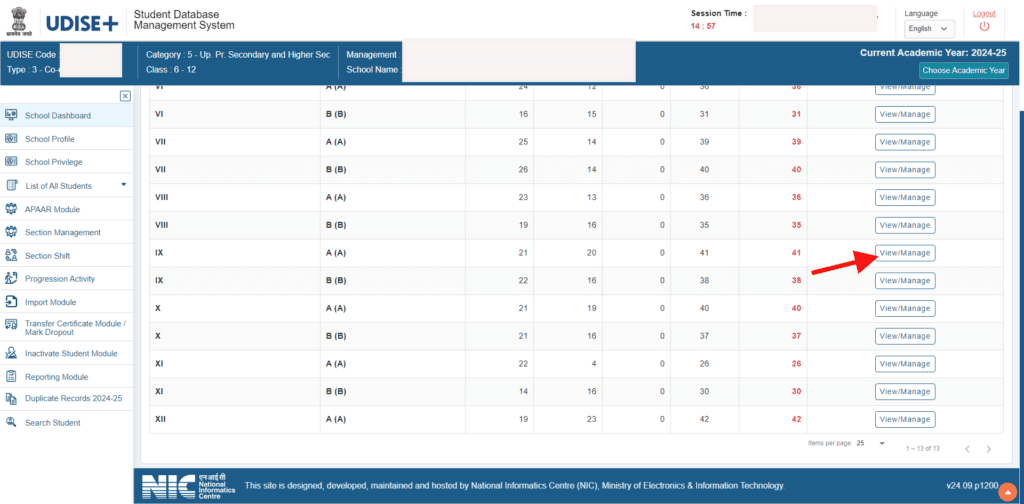
Step 5: Update Students Information On UDISE+ Class Wise – Click on View/Manage Button
In order to generate APAAR, Student’s all forms should be completed (GP, EP, FP and Finalise).
- Navigate to the “Student Information” or “Student Data” section.
- Select the academic year (2025-26).
- Choose the class/grade level (e.g., 1-12) for which you want to update student information.
- Click on the “View/Manage” button next to the selected class.
- Review and update student information, including:
- Student name and ID.
- Date of birth.
- Gender.
- Parent/guardian details.
- Attendance and enrollment status.
- Academic performance (if applicable).
- Add new students or edit/remove existing student records as needed.
Ensure all required fields are completed.
By completing this step, users ensure their school’s student data is up-to-date, accurate, and reflected in the UDISE+ database.
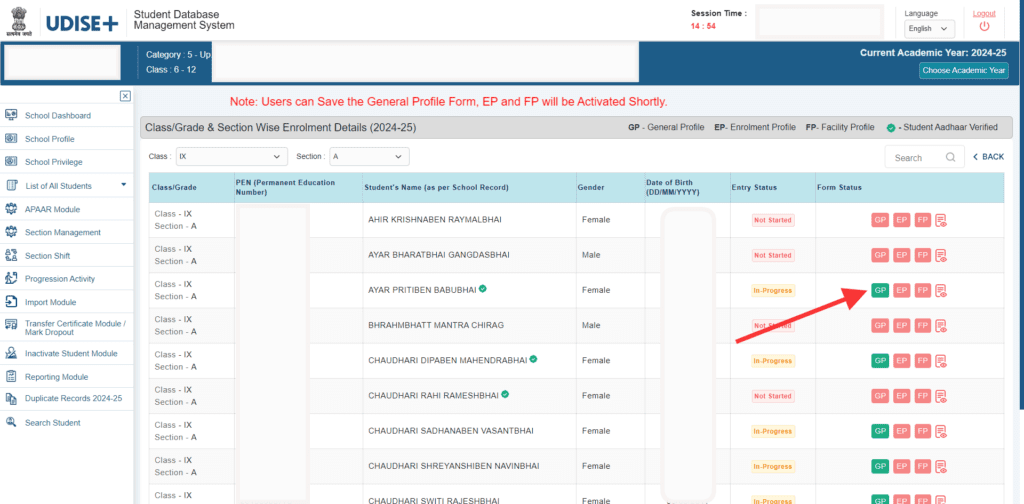
Step 6: Update General Profile (GP) of Students on UDISE+
In order to generate APAAR, Student’s all forms should be completed (GP, EP, FP and Finalise).
Update the general profile information of students for the academic year 2024-25.
- Personal details:
- – Name
- – Date of birth
- – Gender
- – Religion
- – Caste/category
- – Disability status
- Family details:
- Parent/guardian name
- Occupation
- Education
- Income
- Contact information:
- Address
- Phone number
- Email (if applicable)
- Academic history:
- Previous school attended
- Class/grade previously completed
- Other relevant details
- Review and verify the updated information.
- Save or submit the changes.
By completing this step, users ensure their school’s student general profile information is up-to-date and accurate in the UDISE+ database.

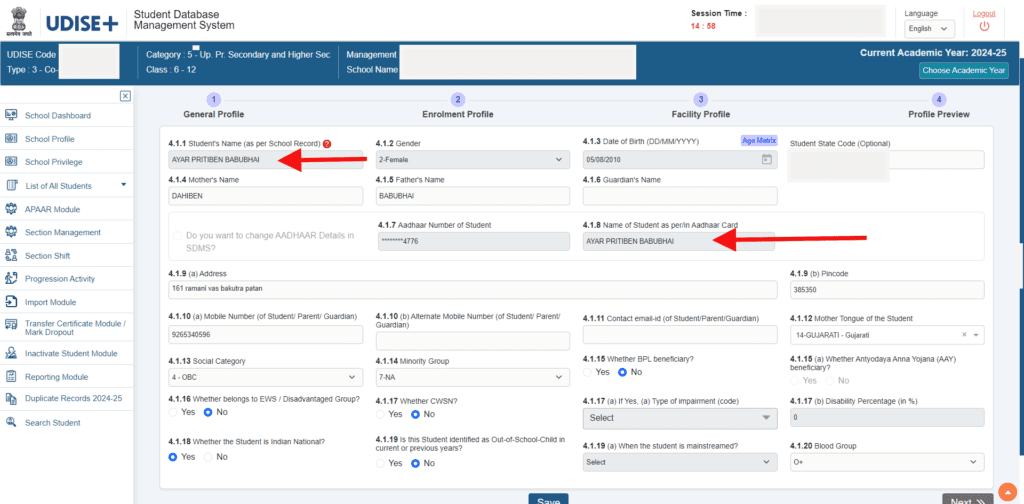
Step 7 : Verify Student Names and Aadhaar Details Check
Students Name (As Per School Record) on General Profile (GP) of Students on UDISE+ Student name spelling and format match exactly.
- Date of birth matches.
- Gender matches.
- Ensure the Aadhaar card number is:
- Entered correctly.
- Valid (12 digits).
- Linked to the correct student.
- Resolve any discrepancies:
- Update the student’s name in the school record or UDISE+ to match the Aadhaar card.
- Correct Aadhaar card number errors.
- Confirm and save the verified information.
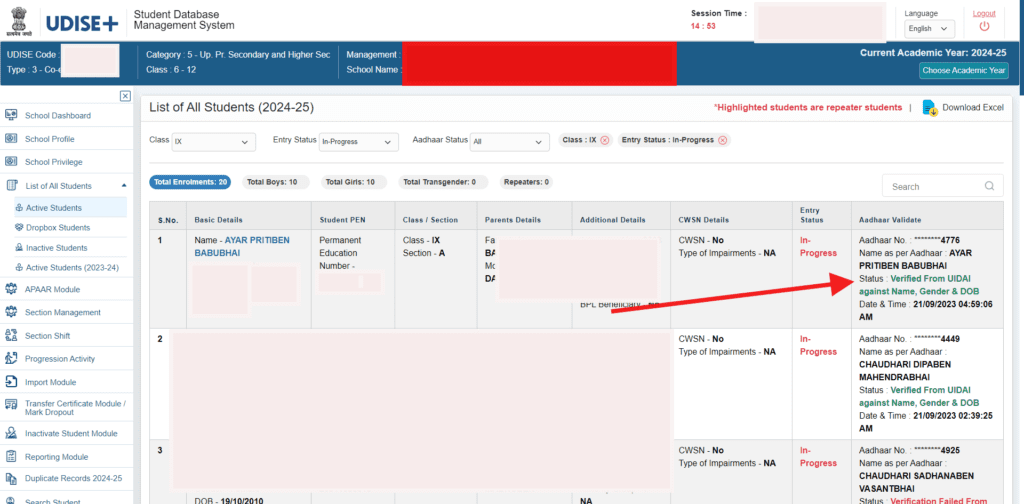
Step 8 : Check Status of Aadhaar Validation
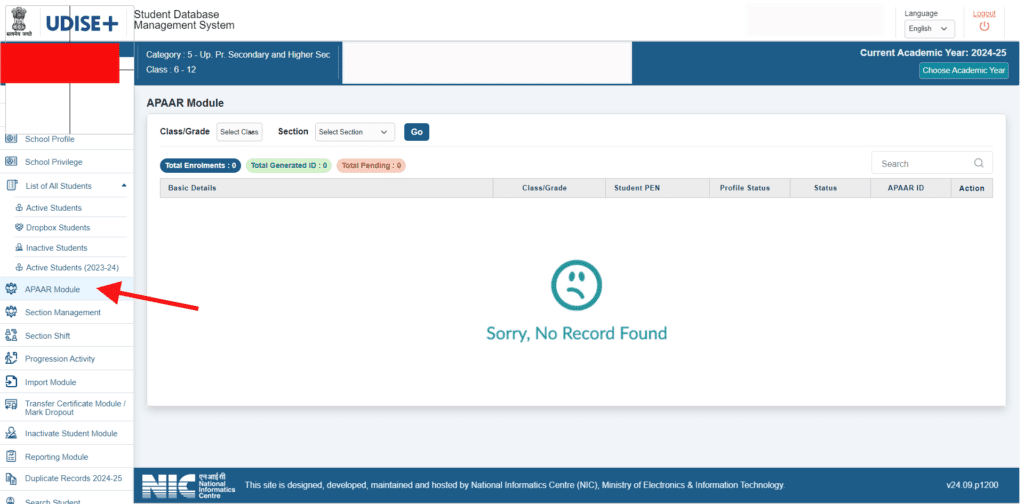
Step 9 : Create a unique APAAR ID for each student.
- Navigate to the “APAAR Module” or “APAAR Reporting” section.
- Click on “Create APAAR ID” or “Generate APAAR Number”.
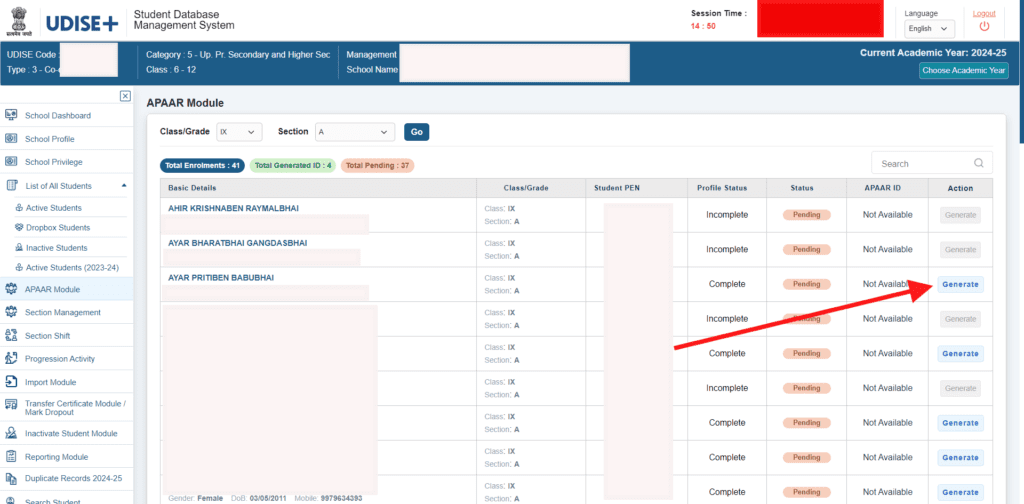
- Select the academic year (2025-26).
- Choose the class/grade level.
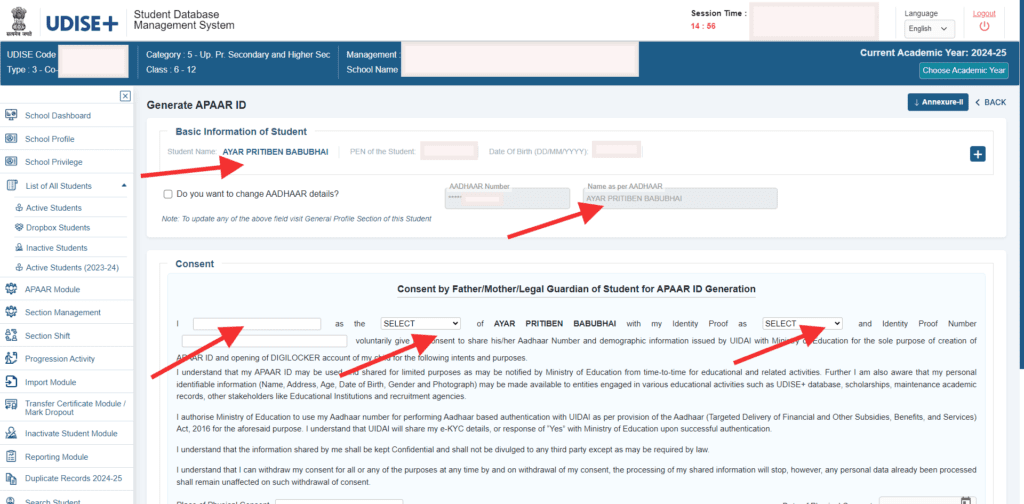
- Enter required student information (e.g., name, Aadhaar number).
- Click “Submit” or “Generate”.
- Note down the generated APAAR ID.
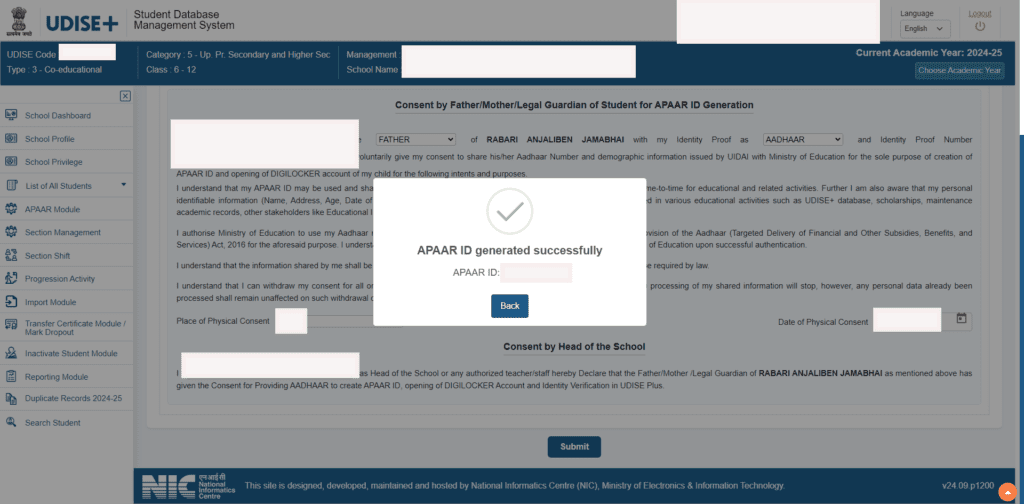
Step 10 : Consent By Father/Mother/Legal Guardian Of Student For APPAR ID Genration
- Obtain a signed consent form from the parent/legal guardian.
- Verify the parent/legal guardian’s identity.
- Confirm their relationship with the student.
- Explain APAAR ID purpose and benefits.
- Ensure understanding of data usage and security.
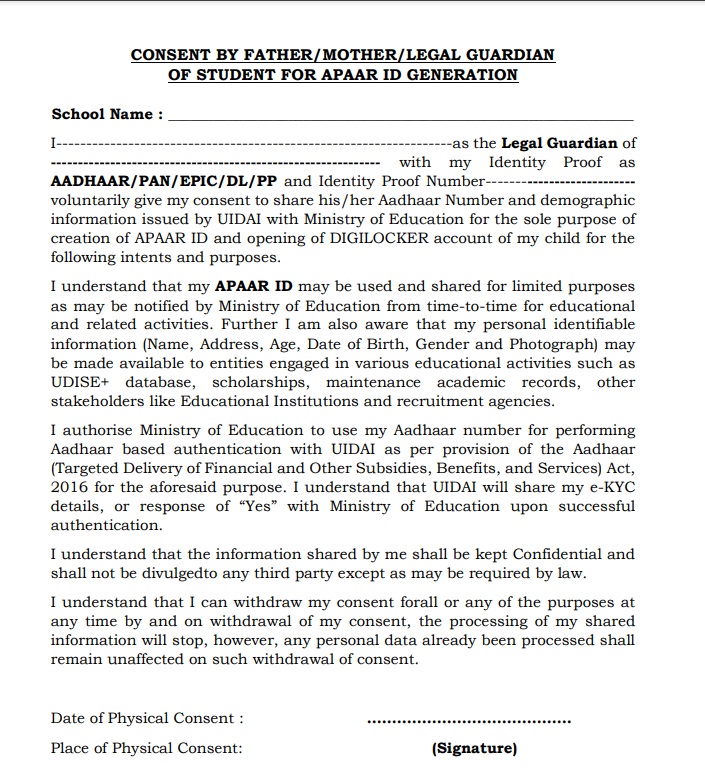
Consent Form Requirements :
- Name and signature of father/mother/legal guardian.
- Student’s name and APAAR ID (if generated).
- Date of consent.
- Declaration of understanding.
Step 11 : Final Step APPAR ID Generation
Troubleshooting Common Issues
- Duplicate APAAR ID
- Cause: Incorrect student information or duplicate entry.
- Solution: Verify student details, delete duplicates, and regenerate APAAR ID.
- Invalid Student Information
- Cause: Incorrect or incomplete student data.
- Solution: Update student information, ensure accuracy, and retry APAAR ID generation.
- Aadhaar Number Mismatch
- Cause: Incorrect or invalid Aadhaar number.
- Solution: Verify Aadhaar number, update if necessary, and retry APAAR ID generation.
- Consent Form Errors
- Cause: Incomplete or missing consent forms.
- Solution: Obtain complete consent forms, upload to UDISE+, and retry APAAR ID generation.
- System Errors
- Cause: Technical issues or server problems.
- Solution: Contact UDISE+ support, check system status, and retry APAAR ID generation.
- Invalid APAAR ID Format
- Cause: Incorrect APAAR ID composition.
- Solution: Regenerate APAAR ID, ensuring correct format.
- Student Not Found
- Cause: Student data not synced or missing.
- Solution: Verify student enrollment, update records, and retry APAAR ID generation.
- Multiple APAAR IDs
- Cause: Duplicate APAAR ID generation.
- Solution: Delete duplicate IDs, ensure unique APAAR ID per student.
Troubleshooting Steps :
- Verify student information and Aadhaar details.
- Check consent forms for completeness and accuracy.
- Ensure system requirements and browser compatibility.
- Contact UDISE+ support for technical assistance.
- Review APAAR ID generation logs for errors.
- Validate APAAR ID format and uniqueness.