Category: Learn MySQL

Learn MySQL is your go-to category for mastering MySQL, one of the most popular relational database management systems. Here, you’ll find comprehensive guides, tutorials, and tips on everything from database basics to advanced MySQL techniques. Whether you’re a beginner learning about tables and queries, or an experienced developer looking to optimize database performance, our resources are designed to make complex concepts accessible and actionable. Start exploring and unlock the power of MySQL to enhance your data management and development skills!

  • MySQL Create Table

    MySQL Create Table

    How to Create a Table in MySQL – A Beginner’s Guide by Itxperts

    Creating tables in MySQL is a fundamental skill for anyone working with databases. Tables organize data into rows and columns, making it easy to store and retrieve information. In this guide by ITxperts, we’ll walk you through everything you need to know to create tables in MySQL, from basic syntax to practical examples.


    What You’ll Learn

    • The basic syntax for creating tables in MySQL
    • Key elements in table creation, such as column definitions, data types, and constraints
    • Practical examples to reinforce your learning

    Why Create Tables?

    Tables form the backbone of relational databases, enabling you to structure data in a meaningful way. Whether you’re building a small application or managing a large dataset, knowing how to create tables effectively is essential for organizing and managing data.


    MySQL CREATE TABLE Syntax

    The CREATE TABLE statement in MySQL lets you define a new table with specified columns, data types, and constraints. Here’s the basic syntax:

    CREATE TABLE table_name (
       column1 datatype constraints,
       column2 datatype constraints,
       ...
    );
    • table_name: Name of the new table.
    • column1, column2, …: Columns in the table, each with a defined data type and optional constraints.

    Understanding Data Types

    Choosing the right data type for each column is crucial. Here are some commonly used MySQL data types:

    • INT: For whole numbers
    • VARCHAR(size): For variable-length strings
    • DATE: For dates in the format YYYY-MM-DD
    • FLOAT: For floating-point numbers
    • BOOLEAN: For true/false values

    Adding Constraints

    Constraints in MySQL help define rules for data integrity. Some common constraints include:

    • PRIMARY KEY: Ensures unique values in a column, often used for IDs
    • NOT NULL: Prevents null (empty) values
    • UNIQUE: Ensures all values in a column are unique
    • DEFAULT: Sets a default value if none is provided
    • FOREIGN KEY: Links to a column in another table, establishing a relationship

    Example: Creating a Basic Table

    Let’s create a sample table for a blog application, called users, where we’ll store user details like ID, name, email, and registration date:

    CREATE TABLE users (
        user_id INT PRIMARY KEY AUTO_INCREMENT,
        name VARCHAR(100) NOT NULL,
        email VARCHAR(100) UNIQUE NOT NULL,
        registration_date DATE DEFAULT CURRENT_DATE
    );

    Explanation of the Example

    • user_id: An integer serving as the primary key and is set to auto-increment.
    • name: A VARCHAR field allowing up to 100 characters, required (NOT NULL).
    • email: A unique field ensuring no two users can register with the same email.
    • registration_date: A date field with a default value of the current date.

    Using CREATE TABLE with Foreign Keys

    To create relationships between tables, you can use foreign keys. Here’s an example where we create a posts table linked to the users table.

    CREATE TABLE posts (
        post_id INT PRIMARY KEY AUTO_INCREMENT,
        user_id INT,
        content TEXT NOT NULL,
        posted_date DATE DEFAULT CURRENT_DATE,
        FOREIGN KEY (user_id) REFERENCES users(user_id)
    );

    In this example, user_id is a foreign key linking each post to a user in the users table.


    Additional Tips

    • Use Descriptive Column Names: Ensure your column names make the data purpose clear.
    • Optimize Data Types: Choose data types that best represent your data to save storage.
    • Plan for Relationships: Use foreign keys for referential integrity when designing relational tables.

    Wrapping Up

    Creating tables is a foundational step in building databases in MySQL. With the right structure and constraints, you can manage and retrieve data efficiently. Practice creating tables with different configurations, and soon you’ll be ready to handle more complex database designs.

    Stay tuned for more MySQL tutorials from ITxperts!

  • MySQL Date & Time Functions

    MySQL Date & Time Functions

    Working with date and time is a crucial aspect of database management, and MySQL offers a rich set of built-in functions to handle date and time data types efficiently. Whether you need to extract a specific part of the date, perform calculations, or format data in a particular way, MySQL has you covered. In this blog post, we’ll explore all the essential date and time functions in MySQL, along with their syntax and practical examples to make your database management smoother.


    1. NOW() Function

    The NOW() function returns the current date and time in the format YYYY-MM-DD HH:MM:SS.

    Syntax:

    SELECT NOW();

    Example:

    SELECT NOW();

    Output:

    2024-10-17 10:30:45

    2. CURDATE() Function

    The CURDATE() function returns the current date in the format YYYY-MM-DD.

    Syntax:

    SELECT CURDATE();

    Example:

    SELECT CURDATE();

    Output:

    2024-10-17

    3. CURTIME() Function

    The CURTIME() function returns the current time in the format HH:MM:SS.

    Syntax:

    SELECT CURTIME();

    Example:

    SELECT CURTIME();

    Output:

    10:30:45

    4. DATE() Function

    The DATE() function extracts the date part from a DATETIME or TIMESTAMP value.

    Syntax:

    SELECT DATE('2024-10-17 10:30:45');

    Example:

    SELECT DATE('2024-10-17 10:30:45');

    Output:

    2024-10-17

    5. TIME() Function

    The TIME() function extracts the time part from a DATETIME or TIMESTAMP value.

    Syntax:

    SELECT TIME('2024-10-17 10:30:45');

    Example:

    SELECT TIME('2024-10-17 10:30:45');

    Output:

    10:30:45

    6. YEAR(), MONTH(), DAY() Functions

    These functions extract the year, month, or day part from a date.

    Syntax:

    SELECT YEAR('2024-10-17'), MONTH('2024-10-17'), DAY('2024-10-17');

    Example:

    SELECT YEAR('2024-10-17'), MONTH('2024-10-17'), DAY('2024-10-17');

    Output:

    2024 | 10 | 17

    7. HOUR(), MINUTE(), SECOND() Functions

    These functions extract the hour, minute, or second part from a time or DATETIME.

    Syntax:

    SELECT HOUR('10:30:45'), MINUTE('10:30:45'), SECOND('10:30:45');

    Example:

    SELECT HOUR('10:30:45'), MINUTE('10:30:45'), SECOND('10:30:45');

    Output:

    10 | 30 | 45

    8. DATE_FORMAT() Function

    The DATE_FORMAT() function formats the date or time value based on the specified format string.

    Syntax:

    SELECT DATE_FORMAT(date, format);

    Example:

    SELECT DATE_FORMAT('2024-10-17', '%W, %M %d, %Y');

    Output:

    Thursday, October 17, 2024

    9. STR_TO_DATE() Function

    The STR_TO_DATE() function converts a string into a date using the specified format.

    Syntax:

    SELECT STR_TO_DATE(string, format);

    Example:

    SELECT STR_TO_DATE('17-10-2024', '%d-%m-%Y');

    Output:

    2024-10-17

    10. DATE_ADD() Function

    The DATE_ADD() function adds a specified time interval to a date.

    Syntax:

    SELECT DATE_ADD(date, INTERVAL value unit);

    Example:

    SELECT DATE_ADD('2024-10-17', INTERVAL 10 DAY);

    Output:

    2024-10-27

    11. DATE_SUB() Function

    The DATE_SUB() function subtracts a specified time interval from a date.

    Syntax:

    SELECT DATE_SUB(date, INTERVAL value unit);

    Example:

    SELECT DATE_SUB('2024-10-17', INTERVAL 5 DAY);

    Output:

    2024-10-12

    12. DATEDIFF() Function

    The DATEDIFF() function returns the difference in days between two dates.

    Syntax:

    SELECT DATEDIFF(date1, date2);

    Example:

    SELECT DATEDIFF('2024-10-17', '2024-10-10');

    Output:

    7

    13. TIMEDIFF() Function

    The TIMEDIFF() function returns the difference between two time values.

    Syntax:

    SELECT TIMEDIFF(time1, time2);

    Example:

    SELECT TIMEDIFF('10:30:45', '08:00:00');

    Output:

    02:30:45

    14. LAST_DAY() Function

    The LAST_DAY() function returns the last day of the month for a given date.

    Syntax:

    SELECT LAST_DAY(date);

    Example:

    SELECT LAST_DAY('2024-10-17');

    Output:

    2024-10-31

    15. WEEKDAY() Function

    The WEEKDAY() function returns the index of the weekday for a date (0 for Monday, 6 for Sunday).

    Syntax:

    SELECT WEEKDAY(date);

    Example:

    SELECT WEEKDAY('2024-10-17');

    Output:

    3

    Conclusion

    MySQL offers a powerful suite of date and time functions that make working with temporal data easy and efficient. Whether you need to extract specific parts of a date, perform calculations, or format it in a user-friendly way, these functions will help you manage your data seamlessly.

    At ITxperts, we aim to simplify your learning process by providing clear, concise, and practical guides. We hope this article helps you master MySQL’s date and time functions!

    Stay tuned for more tutorials and tips from ITxperts!

  • MySQL String/Text Functions

    MySQL String/Text Functions

    MySQL offers a variety of string functions that allow developers and database administrators to manipulate and handle text data efficiently. These functions are useful for searching, formatting, and manipulating strings stored in databases. Below is a comprehensive guide to MySQL string functions, complete with syntax and examples to help you understand their usage.

    1. CONCAT()

    Purpose: Concatenates two or more strings.

    Syntax:

    CONCAT(string1, string2, ..., stringN);

    Example:

    SELECT CONCAT('Hello', ' ', 'World!') AS Result;
    -- Output: 'Hello World!'

    2. LENGTH()

    Purpose: Returns the length of a string in bytes.

    Syntax:

    LENGTH(string);

    Example:

    SELECT LENGTH('Hello') AS Length;
    -- Output: 5

    3. CHAR_LENGTH() / CHARACTER_LENGTH()

    Purpose: Returns the length of a string in characters.

    Syntax:

    CHAR_LENGTH(string);
    CHARACTER_LENGTH(string);

    Example:

    SELECT CHAR_LENGTH('Hello') AS CharLength;
    -- Output: 5

    4. LOWER()

    Purpose: Converts all characters in a string to lowercase.

    Syntax:

    LOWER(string);

    Example:

    SELECT LOWER('MYSQL') AS Lowercase;
    -- Output: 'mysql'

    5. UPPER()

    Purpose: Converts all characters in a string to uppercase.

    Syntax:

    UPPER(string);

    Example:

    SELECT UPPER('mysql') AS Uppercase;
    -- Output: 'MYSQL'

    6. SUBSTRING() / SUBSTR()

    Purpose: Extracts a substring from a string.

    Syntax:

    SUBSTRING(string, start, length);

    Example:

    SELECT SUBSTRING('Hello World', 7, 5) AS SubStr;
    -- Output: 'World'

    7. TRIM()

    Purpose: Removes leading and trailing spaces from a string.

    Syntax:

    TRIM(string);

    Example:

    SELECT TRIM('   Hello World   ') AS Trimmed;
    -- Output: 'Hello World'

    8. LTRIM()

    Purpose: Removes leading spaces from a string.

    Syntax:

    LTRIM(string);

    Example:

    SELECT LTRIM('   Hello World') AS LTrimmed;
    -- Output: 'Hello World'

    9. RTRIM()

    Purpose: Removes trailing spaces from a string.

    Syntax:

    RTRIM(string);

    Example:

    SELECT RTRIM('Hello World   ') AS RTrimmed;
    -- Output: 'Hello World'

    10. REPLACE()

    Purpose: Replaces occurrences of a substring within a string with another substring.

    Syntax:

    REPLACE(original_string, substring_to_replace, replacement_string);

    Example:

    SELECT REPLACE('Hello World', 'World', 'MySQL') AS Replaced;
    -- Output: 'Hello MySQL'

    11. INSTR()

    Purpose: Returns the position of the first occurrence of a substring in a string.

    Syntax:

    INSTR(string, substring);

    Example:

    SELECT INSTR('Hello World', 'World') AS Position;
    -- Output: 7

    12. REPEAT()

    Purpose: Repeats a string a specified number of times.

    Syntax:

    REPEAT(string, count);

    Example:

    SELECT REPEAT('MySQL', 3) AS Repeated;
    -- Output: 'MySQLMySQLMySQL'

    13. REVERSE()

    Purpose: Reverses the order of characters in a string.

    Syntax:

    REVERSE(string);

    Example:

    SELECT REVERSE('MySQL') AS Reversed;
    -- Output: 'LQSyM'

    14. LPAD()

    Purpose: Pads the left side of a string with another string.

    Syntax:

    LPAD(string, length, pad_string);

    Example:

    SELECT LPAD('MySQL', 8, '-') AS LeftPadded;
    -- Output: '---MySQL'

    15. RPAD()

    Purpose: Pads the right side of a string with another string.

    Syntax:

    RPAD(string, length, pad_string);

    Example:

    SELECT RPAD('MySQL', 8, '-') AS RightPadded;
    -- Output: 'MySQL---'

    16. SPACE()

    Purpose: Returns a string of spaces.

    Syntax:

    SPACE(number);

    Example:

    SELECT SPACE(5) AS FiveSpaces;
    -- Output: '     '

    17. FIND_IN_SET()

    Purpose: Returns the position of a string in a comma-separated list.

    Syntax:

    FIND_IN_SET(string, string_list);

    Example:

    SELECT FIND_IN_SET('apple', 'banana,apple,orange') AS Position;
    -- Output: 2

    18. FORMAT()

    Purpose: Formats a number as a string with grouped thousands.

    Syntax:

    FORMAT(number, decimal_places);

    Example:

    SELECT FORMAT(1234567.891, 2) AS FormattedNumber;
    -- Output: '1,234,567.89'

    19. LEFT()

    Purpose: Returns the left part of a string with the specified number of characters.

    Syntax:

    LEFT(string, length);

    Example:

    SELECT LEFT('MySQL Database', 5) AS LeftPart;
    -- Output: 'MySQL'

    20. RIGHT()

    Purpose: Returns the right part of a string with the specified number of characters.

    Syntax:

    RIGHT(string, length);

    Example:

    SELECT RIGHT('MySQL Database', 8) AS RightPart;
    -- Output: 'Database'

    Conclusion

    These string functions in MySQL make it easy to work with text data in your databases. By understanding and utilizing these functions, you can perform a variety of tasks such as searching, formatting, and modifying strings efficiently.

    Stay tuned for more tutorials and database tips from ITXperts!


  • MySQL Numeric Functions

    MySQL Numeric Functions

    MySQL provides a rich set of numeric functions that allow you to perform various mathematical operations and manipulations on numerical data. These functions are useful when working with calculations, statistical analysis, and data transformations in your MySQL databases. In this blog post, we’ll explore all the important numeric functions in MySQL, along with examples to help you understand how to use them effectively.

    By ITXperts


    Table of Contents

    1. ABS()
    2. CEIL() / CEILING()
    3. FLOOR()
    4. ROUND()
    5. TRUNCATE()
    6. MOD()
    7. POWER()
    8. SQRT()
    9. LOG()
    10. EXP()
    11. PI()
    12. SIN(), COS(), TAN()
    13. SIGN()
    14. RAND()

    1. ABS() – Absolute Value

    The ABS() function returns the absolute (non-negative) value of a number.

    Syntax:

    SELECT ABS(number);

    Example:

    SELECT ABS(-15); -- Returns 15

    2. CEIL() / CEILING() – Round Up

    CEIL() (or CEILING()) rounds a number up to the nearest integer.

    Syntax:

    SELECT CEIL(number);

    Example:

    SELECT CEIL(4.3); -- Returns 5
    SELECT CEIL(-4.8); -- Returns -4

    3. FLOOR() – Round Down

    FLOOR() rounds a number down to the nearest integer.

    Syntax:

    SELECT FLOOR(number);

    Example:

    SELECT FLOOR(7.8); -- Returns 7
    SELECT FLOOR(-3.2); -- Returns -4

    4. ROUND() – Round to Nearest Value

    ROUND() rounds a number to a specified number of decimal places. You can also use it to round to the nearest integer.

    Syntax:

    SELECT ROUND(number, decimal_places);

    Example:

    SELECT ROUND(3.14159, 2); -- Returns 3.14
    SELECT ROUND(123.456, 0); -- Returns 123

    5. TRUNCATE() – Truncate to Decimal Places

    TRUNCATE() truncates a number to a specified number of decimal places without rounding.

    Syntax:

    SELECT TRUNCATE(number, decimal_places);

    Example:

    SELECT TRUNCATE(3.14159, 2); -- Returns 3.14
    SELECT TRUNCATE(123.456, 0); -- Returns 123

    6. MOD() – Modulus (Remainder)

    MOD() returns the remainder of a division operation.

    Syntax:

    SELECT MOD(dividend, divisor);

    Example:

    SELECT MOD(10, 3); -- Returns 1
    SELECT MOD(17, 4); -- Returns 1

    7. POWER() – Exponentiation

    POWER() raises a number to a specified power.

    Syntax:

    SELECT POWER(number, exponent);

    Example:

    SELECT POWER(2, 3); -- Returns 8 (2 raised to the power of 3)
    SELECT POWER(5, 2); -- Returns 25

    8. SQRT() – Square Root

    SQRT() returns the square root of a number.

    Syntax:

    SELECT SQRT(number);

    Example:

    SELECT SQRT(16); -- Returns 4
    SELECT SQRT(81); -- Returns 9

    9. LOG() – Natural Logarithm

    LOG() returns the natural logarithm (base e) of a number. You can also specify a different base for the logarithm.

    Syntax:

    SELECT LOG(number);
    SELECT LOG(base, number);

    Example:

    SELECT LOG(2.718281828); -- Returns 1 (natural log of e)
    SELECT LOG(10, 100); -- Returns 2 (log base 10 of 100)

    10. EXP() – Exponential Function

    EXP() returns e raised to the power of the given number.

    Syntax:

    SELECT EXP(number);

    Example:

    SELECT EXP(1); -- Returns 2.718281828 (e^1)
    SELECT EXP(2); -- Returns 7.389056099 (e^2)

    11. PI() – Value of Pi

    PI() returns the value of Pi (π), which is approximately 3.141593.

    Syntax:

    SELECT PI();

    Example:

    SELECT PI(); -- Returns 3.141593

    12. SIN(), COS(), TAN() – Trigonometric Functions

    MySQL provides basic trigonometric functions like SIN() (sine), COS() (cosine), and TAN() (tangent).

    Syntax:

    SELECT SIN(number);
    SELECT COS(number);
    SELECT TAN(number);

    Example:

    SELECT SIN(PI()/2); -- Returns 1 (sine of 90 degrees)
    SELECT COS(PI()); -- Returns -1 (cosine of 180 degrees)
    SELECT TAN(0); -- Returns 0 (tangent of 0 degrees)

    13. SIGN() – Sign of a Number

    SIGN() returns the sign of a number as -1, 0, or 1, depending on whether the number is negative, zero, or positive.

    Syntax:

    SELECT SIGN(number);

    Example:

    SELECT SIGN(-10); -- Returns -1
    SELECT SIGN(0); -- Returns 0
    SELECT SIGN(25); -- Returns 1

    14. RAND() – Generate a Random Number

    RAND() generates a random floating-point number between 0 and 1. Optionally, you can provide a seed for repeatable random values.

    Syntax:

    SELECT RAND();
    SELECT RAND(seed);

    Example:

    SELECT RAND(); -- Returns a random number (e.g., 0.3456)
    SELECT RAND(100); -- Returns the same random number every time when using the same seed

    Conclusion

    These are the most commonly used numeric functions in MySQL. Each of these functions serves a different purpose, whether it’s rounding numbers, performing trigonometric calculations, generating random numbers, or calculating powers and logarithms. Mastering these functions will help you work efficiently with numerical data in MySQL.

    For more advanced use cases or if you have any questions, feel free to reach out to us at ITXperts. Happy coding!

  • Comprehensive MySQL Practice Worksheet for CBSE Class 11th & 12th: Mastering DDL, DML, TCL, and SQL Functions

    Comprehensive MySQL Practice Worksheet for CBSE Class 11th & 12th: Mastering DDL, DML, TCL, and SQL Functions

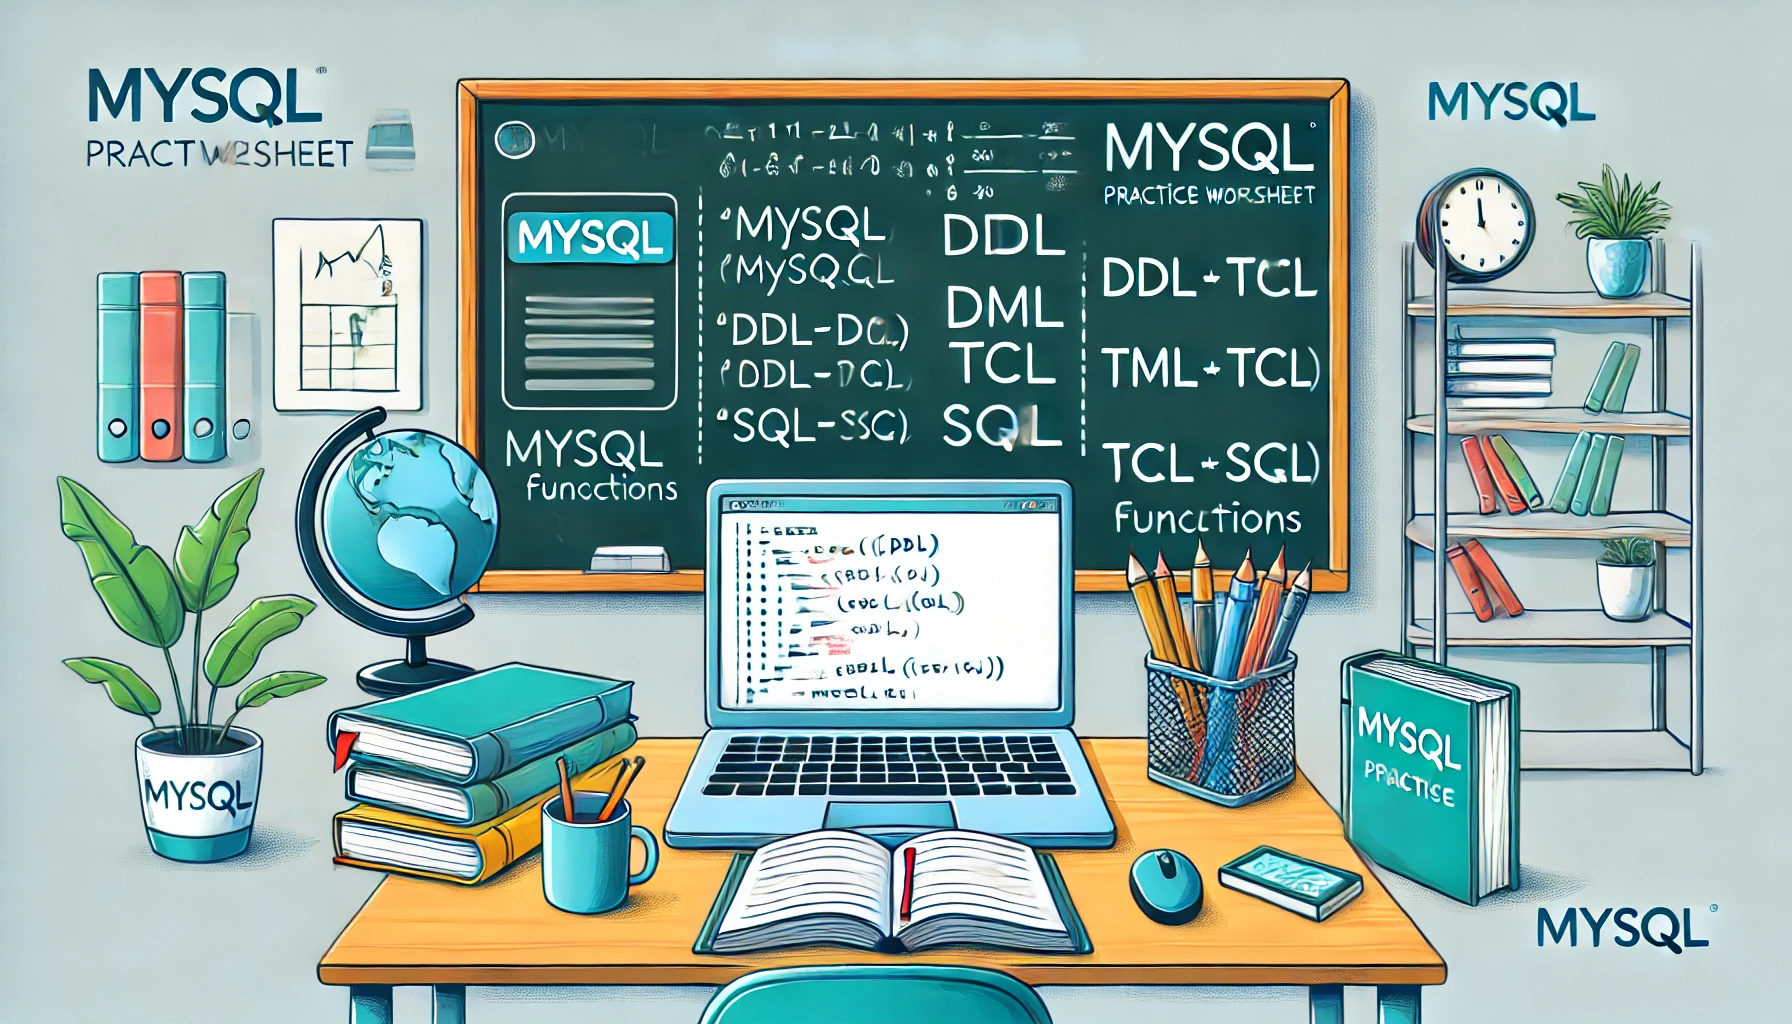
    MySQL is an essential part of the Class 11th and 12th CBSE Computer Science curriculum. Mastering MySQL enables students to manage and interact with databases effectively, a skill highly valued in programming and data management. This worksheet is designed to give CBSE students hands-on practice with MySQL operations, including Data Definition Language (DDL), Data Manipulation Language (DML), Transaction Control Language (TCL), and commonly used SQL Functions. Let’s dive into some key exercises that will help you get familiar with these concepts.


    Part 1: Data Definition Language (DDL)

    DDL commands are used to define or modify the structure of the database and database objects like tables. The most common DDL commands are CREATE, ALTER, DROP, and TRUNCATE.

    Exercise 1: Create and Modify Tables

    1. Create a table Students with the following structure:
    • StudentID (INT, PRIMARY KEY, AUTO_INCREMENT)
    • FirstName (VARCHAR(30))
    • LastName (VARCHAR(30))
    • DOB (DATE)
    • Marks (INT) Solution:
       CREATE TABLE Students (
         StudentID INT PRIMARY KEY AUTO_INCREMENT,
         FirstName VARCHAR(30),
         LastName VARCHAR(30),
         DOB DATE,
         Marks INT
       );
    1. Alter the table to add a new column Gender (CHAR(1)) to the Students table. Solution:
       ALTER TABLE Students ADD Gender CHAR(1);
    1. Drop a column from the table.
      Drop the Marks column from the Students table. Solution:
       ALTER TABLE Students DROP COLUMN Marks;

    Part 2: Data Manipulation Language (DML)

    DML commands deal with manipulating data in the tables. Common commands include INSERT, UPDATE, DELETE, and SELECT.

    Exercise 2: Insert, Update, and Delete Data

    1. Insert records into the Students table. Insert the following data:
    • FirstName: Ravi, LastName: Kumar, DOB: 2004-05-15, Gender: M
    • FirstName: Priya, LastName: Sharma, DOB: 2003-08-10, Gender: F Solution:
       INSERT INTO Students (FirstName, LastName, DOB, Gender) 
       VALUES ('Ravi', 'Kumar', '2004-05-15', 'M'), 
              ('Priya', 'Sharma', '2003-08-10', 'F');
    1. Update a record: Change Priya’s last name from Sharma to Gupta. Solution:
       UPDATE Students 
       SET LastName = 'Gupta' 
       WHERE FirstName = 'Priya' AND LastName = 'Sharma';
    1. Delete a record: Remove Ravi’s record from the Students table. Solution:
       DELETE FROM Students 
       WHERE FirstName = 'Ravi';

    Part 3: Transaction Control Language (TCL)

    TCL commands control the transactions in a database. Common TCL commands include COMMIT, ROLLBACK, and SAVEPOINT.

    Exercise 3: Manage Transactions

    1. Insert data and use transactions to manage it.
      Insert a new student record (Anil, Verma, 2005-07-20, M), and use TCL commands to handle the transaction. Solution:
       START TRANSACTION;
    
       INSERT INTO Students (FirstName, LastName, DOB, Gender) 
       VALUES ('Anil', 'Verma', '2005-07-20', 'M');
    
       -- If satisfied with the result, commit the changes
       COMMIT;
    
       -- Otherwise, rollback the transaction
       -- ROLLBACK;
    1. Set a savepoint during the transaction.
      Insert another record (Nisha, Singh, 2004-09-25, F), but create a savepoint before committing the changes. Solution:
       START TRANSACTION;
    
       INSERT INTO Students (FirstName, LastName, DOB, Gender) 
       VALUES ('Anil', 'Verma', '2005-07-20', 'M');
    
       SAVEPOINT savepoint1;
    
       INSERT INTO Students (FirstName, LastName, DOB, Gender) 
       VALUES ('Nisha', 'Singh', '2004-09-25', 'F');
    
       -- Rollback to the savepoint if necessary
       -- ROLLBACK TO savepoint1;
    
       COMMIT;

    Part 4: SQL Functions

    SQL Functions are used to perform operations on the data stored in a database. They can be aggregate functions like SUM(), AVG(), or string functions like UPPER(), LOWER().

    Exercise 4: Use SQL Functions

    1. Find the average age of all students in the table (assuming the current year is 2024). Solution:
       SELECT AVG(YEAR(CURDATE()) - YEAR(DOB)) AS AverageAge 
       FROM Students;
    1. Count the number of students in the table. Solution:
       SELECT COUNT(*) AS TotalStudents 
       FROM Students;
    1. Concatenate the first and last names of the students to display their full names. Solution:
       SELECT CONCAT(FirstName, ' ', LastName) AS FullName 
       FROM Students;

    Additional Practice Questions

    1. Create a table Books with columns BookID, Title, Author, Price, and PublishedYear.
    2. Insert at least 3 records into the Books table.
    3. Update the price of a book using the UPDATE statement.
    4. Use SELECT statements with WHERE clauses to filter records (e.g., books priced above 500).
    5. Try out TCL commands with a series of inserts and deletions and see how COMMIT and ROLLBACK work in practice.

    Conclusion

    This worksheet provides a comprehensive foundation for CBSE Class 11th and 12th students to understand and practice essential MySQL commands, including DDL, DML, TCL, and SQL functions. Regular practice of these exercises will enhance your ability to manage databases effectively and prepare you for exams and future coursework. Happy learning!

  • Comprehensive Guide to MySQL DML Commands: Syntax and Examples

    Comprehensive Guide to MySQL DML Commands: Syntax and Examples

    Introduction to DML in MySQL

    Database Manipulation Language (DML) is a subset of SQL (Structured Query Language) used for managing data stored in relational databases such as MySQL. DML commands are essential for handling
    data, enabling users to perform operations such as inserting, updating, retrieving, and deleting records.
    The ability to manipulate data effectively is fundamental to ensuring that the database remains accurate
    and up-to-date, reflecting the current state of the information it holds.

    In MySQL, DML commands play a vital role in database management. Specifically, they allow users to interact with data within the database, facilitating the creation of dynamic and flexible applications that require seamless data handling. Understanding DML is crucial for anyone looking to leverage MySQL’s capabilities to create and maintain robust data-driven applications. As such, mastering DML commands is a necessary skill for developers and database administrators alike.

    This blog post serves as a comprehensive tutorial on MySQL DML and aims to cover various DML commands critical to database operations. The focus will primarily be on four main types of DML commands: INSERT, UPDATE, DELETE, and SELECT. The INSERT command allows users to introduce new records into tables, while the UPDATE command enables modification of existing data. The DELETE command is used for removing unwanted records, whereas the SELECT command retrieves data from the database. Each of these commands will be explored in detail, complete with syntactical explanations and practical examples. By the end of this tutorial, readers will gain a solid foundation of DML commands, empowering them to utilize MySQL effectively for their data management needs.

    INSERT Command: Adding Data

    The INSERT command in MySQL is a fundamental SQL statement used to add new records to a database table. Understanding its syntax and variations is crucial for anyone looking to effectively manipulate data using MySQL. This command can be utilized in different forms, depending on whether users wish to insert a single record or multiple entries simultaneously.

    The basic syntax for inserting a single row into a table is structured as follows:

    INSERT INTO table_name (column1, column2, column3, ...)VALUES (value1, value2, value3, ...);

    In this statement, ‘table_name’ represents the target table, while ‘column1, column2, column3, …’ denote the specific columns where data will be inserted. The corresponding ‘VALUES’ statement comprises the actual data that aligns with the specified columns.

    For example, if a table named ’employees’ contains the columns ‘first_name’, ‘last_name’, and ’email’, the INSERT command might look like this:

    INSERT INTO employees (first_name, last_name, email)VALUES ('John', 'Doe', 'john.doe@example.com');

    In contrast, to insert multiple rows into a MySQL table with a single command, the syntax is slightly modified:

    INSERT INTO table_name (column1, column2, ...)VALUES (value1, value2, ...),(value3, value4, ...),(value5, value6, ...);

    This ability not only streamlines the data entry process but also enhances performance, as multiple records can be inserted in a single execution of the command.

    For instance, to insert several new employees into the ’employees’ table simultaneously, the command would be as follows:

    INSERT INTO employees (first_name, last_name, email)VALUES ('Alice', 'Smith', 'alice.smith@example.com'),('Bob', 'Johnson', 'bob.johnson@example.com');

    By leveraging the INSERT command’s capabilities, users can efficiently manage and expand the data within their MySQL databases, laying the groundwork for further database operations and queries.

    UPDATE Command: Modifying Data

    The UPDATE command is a fundamental part of MySQL, designed specifically for altering existing records within a database table. Understanding the syntax of this command is vital for database management and data manipulation. The basic syntax of the UPDATE command is structured as follows:

    UPDATE table_name SET column1 = value1, column2 = value2 WHERE condition;

    In this syntax, table_name denotes the name of the table where modifications are to be made, while column1 and column2 represent the specific columns whose data will be updated. The value1 and value2 are the new values that will replace the current data in those columns. The inclusion of the WHERE clause is critical; it specifies which records should be updated. Without it, all records in the table would be modified, which is typically not the intended outcome.

    A practical example of this command can enhance understanding and application. Suppose we have a table named employees and we want to update the salary of an employee who has recently been promoted. The command would look like this:

    UPDATE employees SET salary = 70000 WHERE employee_id = 123;

    This command effectively changes the salary to 70,000 only for the employee with an ID of 123. Another notable example could involve updating multiple columns simultaneously. For instance, if we also want to update the position of the same employee, the command will be adjusted as follows:

    UPDATE employees SET salary = 70000, position = 'Senior Developer' WHERE employee_id = 123;

    As shown, this command efficiently illustrates how to use all MySQL commands relevant to modifying data in a structured tabular format. Mastery of the UPDATE command within MySQL is crucial for effective database management, ensuring that data remains current and relevant.

    DELETE Command: Removing Data

    The DELETE command in MySQL serves as a fundamental tool for managing the contents of databases by allowing users to remove specific records from tables. Understanding the syntax of the DELETE command is crucial for users who wish to effectively manipulate data within their MySQL databases. The basic syntax for the DELETE command is as follows:

    DELETE FROM table_name WHERE condition;

    In this statement, “table_name” represents the name of the target table, while “condition” specifies which records are to be deleted. It is essential to utilize the WHERE clause judiciously, as failing to include it can result in the inadvertent deletion of all records in the specified table. For example, the command:

    DELETE FROM customers;

    would remove all entries from the customers table, potentially leading to the loss of important data.

    Conditional deletion is a powerful feature of the DELETE command that allows for greater precision when handling MySQL records. For instance, if an organization wanted to delete records of customers based in a particular city, the command would look like this:

    DELETE FROM customers WHERE city = 'New York';

    This command will only remove records of customers residing in New York, preserving the integrity of the remaining data. Moreover, it is advisable to use the SELECT statement to preview the data before deletion to avoid unintended loss. A safer practice includes running:

    SELECT * FROM customers WHERE city = 'New York';

    By examining the results, users can confirm which records will be deleted. Utilizing the DELETE command effectively is a vital aspect of database management within MySQL, ensuring that users can maintain a clean and relevant dataset. In conclusion, mastering the DELETE command paves the way for efficient data management in any MySQL tutorial, enabling users to exercise control over their data effectively.

    SELECT Command with INSERT: Copying Data

    The combination of the SELECT and INSERT commands in MySQL offers a powerful approach to copy data efficiently from one table to another. This technique is particularly useful when you wish to duplicate records or migrate data without the need for additional exports or intermediate files. Understanding the syntax and implementation of this command is essential for effective data management in MySQL.

    The basic syntax for using the SELECT and INSERT commands together is as follows:

    INSERT INTO target_table (column1, column2, ...)SELECT column1, column2, ...FROM source_tableWHERE condition;

    In this structure, the INSERT INTO clause specifies the target table where the data will be copied, followed by the columns intended for the insertion. The SELECT statement fetches the specific columns from the source table, allowing you to simultaneously filter the data through a WHERE clause if necessary.

    As an example, consider a situation where we want to copy all records from a table named employees to another table referred to as archived_employees. Assuming both tables share the same structure, the command would look like this:

    INSERT INTO archived_employees (id, name, position)SELECT id, name, positionFROM employeesWHERE status = 'inactive';

    This command efficiently inserts records of inactive employees into the archived_employees table while preserving data integrity by ensuring that only selected rows are transferred. In scenarios where there is a mismatch in the number of columns or data types between the source and target tables, it’s crucial to adjust the SELECT statement accordingly to prevent errors.

    By mastering the use of the SELECT command with INSERT, you can facilitate seamless data copying processes. This MySQL tutorial emphasizes the importance of understanding the relationship between tables and the commands used, which ultimately enhances your database management skills.

    INSERT INTO SELECT: Inserting Data from Another Table

    The INSERT INTO SELECT statement in MySQL serves as a powerful tool for transferring data between tables within a database. This command allows users to insert rows into a specified table by selecting data from another table, thereby streamlining the process of data manipulation. The basic syntax for this command can be articulated as follows:

    INSERT INTO target_table (column1, column2, ...) SELECT column1, column2, ... FROM source_table WHERE condition;

    In this syntax, target_table refers to the table where data will be inserted, and source_table is the table from which data will be retrieved. Columns must be appropriately matched between the two tables to ensure a successful data transfer. It is also advisable to employ a WHERE clause to filter the rows that will be copied, thereby enhancing control over the dataset.

    For instance, consider a scenario where a company wants to transfer employee records from a former_employees table to a current_employees table. The command would resemble the following:

    INSERT INTO current_employees (employee_id, name, position) SELECT employee_id, name, position FROM former_employees WHERE status = 'active';

    This statement effectively copies only the active employees from the former_employees table to the current_employees table, ensuring that only relevant data is consolidated.

    Upon utilizing the INSERT INTO SELECT command, it is critical to consider the data types and constraints of the target table to avoid runtime errors. Furthermore, the command can be quite useful in data migration scenarios, data warehousing tasks, or simply consolidating two datasets into one. Overall, mastering the INSERT INTO SELECT command is a significant aspect of any comprehensive MySQL tutorial, aiding users in effectively manipulating databases.

    Transaction Control in DML Operations

    Transactions play a crucial role in maintaining data integrity during Data Manipulation Language (DML) operations, which include commands such as INSERT, UPDATE, and DELETE. By grouping a series of operations into a single transaction, MySQL ensures that any changes made to the database are completed successfully or not at all. This is essential for preventing data corruption and ensuring that the database remains in a consistent state. The most important aspects of transaction control in MySQL are the COMMIT and ROLLBACK commands.

    The COMMIT command is used to save all changes made during a transaction. When a user initiates a transaction with a command like START TRANSACTION, any subsequent DML operations are not immediately written to the database. Instead, they are held in a pending state until a COMMIT is issued. This allows the user to review the changes before making them permanent. For example:

    START TRANSACTION;INSERT INTO employees (name, position) VALUES ('John Doe', 'Developer');COMMIT;

    In this example, the employee record is added to the database only after the COMMIT command is executed. If an issue arises before the transaction is committed, the user may opt to discard all changes using the ROLLBACK command. This command undoes all DML operations performed during the transaction, safeguarding the database from inconsistent data states.

    For instance, consider a transaction that involves multiple DML commands:

    START TRANSACTION;UPDATE employees SET position = 'Senior Developer' WHERE name = 'John Doe';DELETE FROM employees WHERE name = 'Jane Smith';ROLLBACK;

    Here, because ROLLBACK is used, neither the update nor the delete operation will be reflected in the database. This use of transactions with COMMIT and ROLLBACK ensures that MySQL maintains a high level of data integrity, which is vital for effective database management.

    Common Errors and Troubleshooting in DML Commands

    When working with MySQL and executing DML commands, users may encounter various errors that can hinder data manipulation processes. Understanding these common pitfalls can help in troubleshooting effectively. One typical error message is the “Duplicate entry for key” error, which occurs when attempting to insert a record that violates a unique constraint. To resolve this, one must ensure that the data being inserted does not already exist in the database or modify the key settings to allow for different values.

    Another frequent issue arises when users encounter syntax errors, often due to incorrect SQL statements. An example includes the infamous “You have an error in your SQL syntax” message. This typically reflects mistakes like missing commas, misspelled keywords, or misidentified table names. A careful review of the SQL command can often resolve this issue. Utilizing tools or IDEs that synthesize MySQL syntax can aid users in identifying these errors before execution.

    Additionally, permission-related issues can impede DML operations, manifesting through error messages indicating a lack of access. In such cases, ensuring that the user has the appropriate permissions to perform specific actions—INSERT, UPDATE, or DELETE—is crucial. The use of the MySQL GRANT statement can effectively rectify these permission-based hindrances.

    It is also essential to adopt best practices when executing DML commands in MySQL. Always back up the data prior to making modifications, thereby safeguarding against unintended data loss. Furthermore, validation of data before insertion or updates helps to ensure data integrity, minimizing the chances of running into common errors. Regular practice with a well-crafted MySQL tutorial can further enhance one’s ability to troubleshoot and resolve issues efficiently.

    Conclusion and Best Practices

    In this comprehensive guide regarding MySQL DML commands, we have explored a variety of critical elements related to data manipulation language in the context of MySQL. DML commands, such as INSERT, UPDATE, and DELETE, serve as essential tools in managing data within a database. Each command plays a vital role in performing operations that add, modify, or remove data, creating a dynamic interaction with the database. Understanding the syntax and structure of each command allows for effective manipulation of data, which is a cornerstone of efficient database management.

    To ensure the effective use of DML commands, several best practices should be adhered to. First and foremost, always ensure that backup copies of your data are maintained prior to executing any UPDATE or DELETE operations. This practice mitigates the risk of accidental data loss and enhances data integrity. Moreover, utilizing transactions can significantly benefit your operations; these allow a series of DML commands to be executed as a single unit, providing the capability to rollback changes in case of errors, thereby maintaining data consistency.

    Additionally, it is crucial to implement proper error handling mechanisms. Utilizing techniques such as conditional statements or stored procedures in your MySQL tutorial can help prevent unwanted results due to bad data or application logic errors. When modifying large datasets, incorporating a WHERE clause in commands can alleviate the impact on performance and ensure that only intended records are affected.

    By incorporating these best practices, users can enhance their proficiency with MySQL commands, leading to more reliable and consistent database applications. Ultimately, a solid grasp and implementation of these concepts will pave the way for optimal data handling and management.